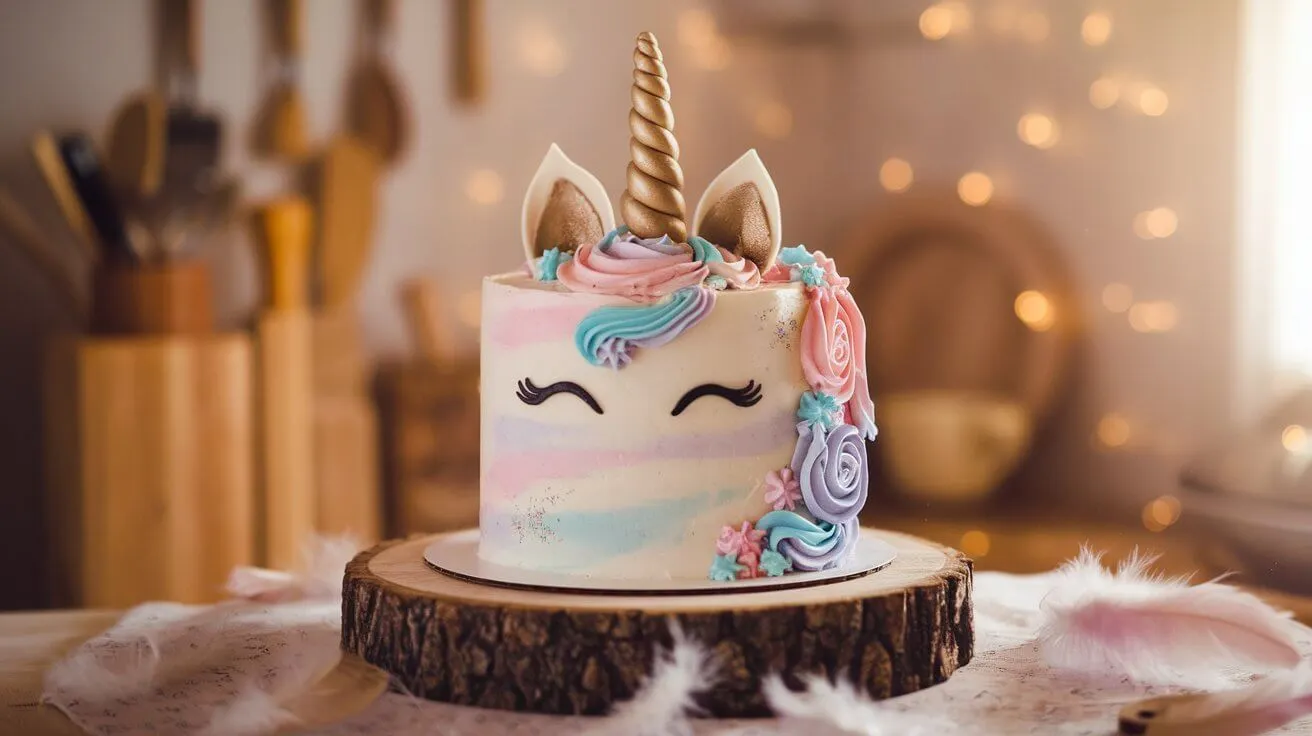
If you’ve ever dreamed of creating a show-stopping unicorn cake, you’re in the right place! Whether you’re planning a magical birthday party, a themed celebration, or simply want to impress with your baking skills, this step-by-step guide will help you achieve a perfect unicorn cake design—no professional experience required.
In this post, you’ll learn how to bake a moist and fluffy unicorn cake, whip up vibrant buttercream frosting, and decorate it with a stunning fondant unicorn horn, pastel rosettes, and edible pearls. We’ll also share expert tips to avoid common mistakes, ensuring your cake not only looks enchanting but tastes delicious too.
Follow these five simple steps to bring your unicorn cake vision to life. By the end of this guide, you’ll have a bakery-worthy unicorn birthday cake that will wow your guests and make every slice feel magical! Let’s get started.
Table of Contents
Step 1: Bake the Perfect Unicorn Cake Base
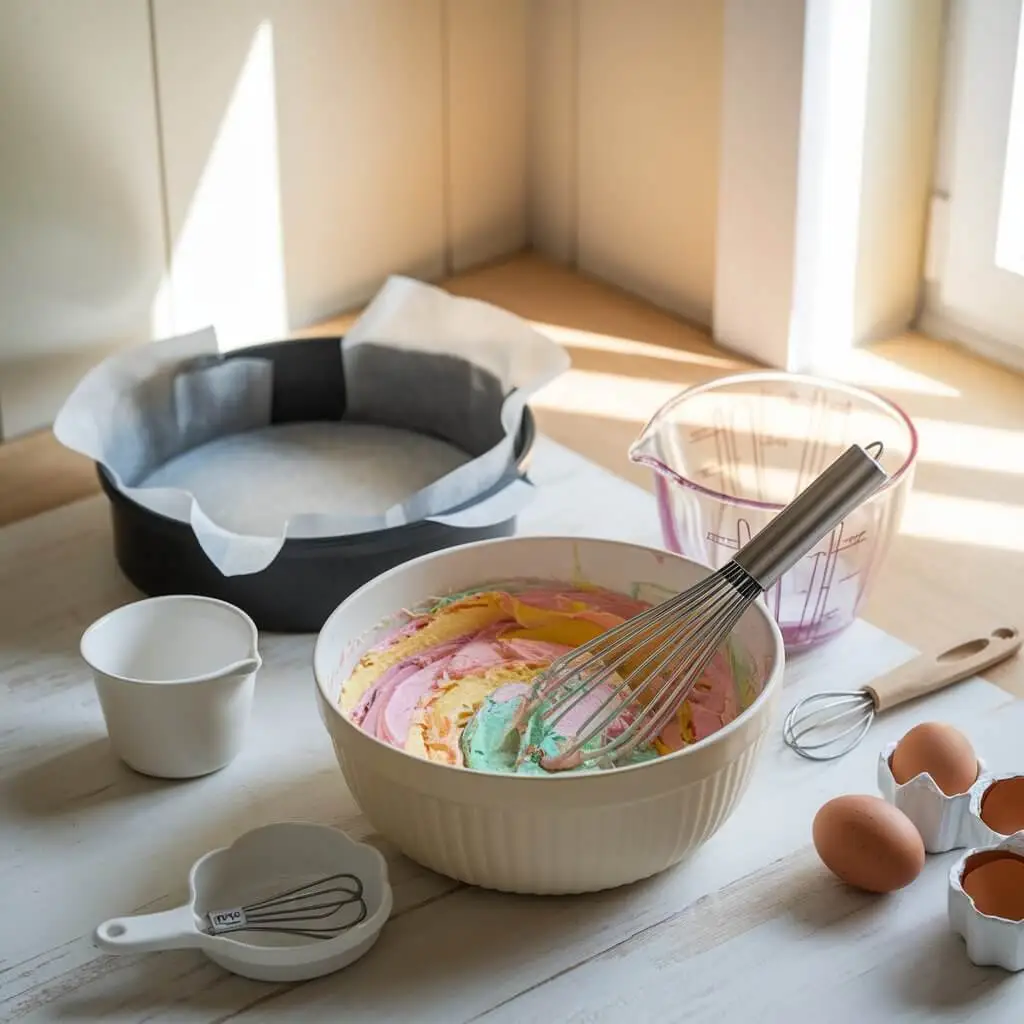
The foundation of any great unicorn cake is a perfectly baked base that is moist, flavorful, and sturdy enough to support layers of frosting and decorations. Whether you’re aiming for a whimsical rainbow cake or a classic pastel-themed design, your cake needs to taste as magical as it looks.
In this step, we’ll guide you through selecting the best cake flavors, achieving vibrant color layers, and baking a soft and fluffy cake that will make your unicorn cake stand out. You’ll also learn how to properly level and prep your cake layers for seamless decorating.
Choosing the Right Cake Flavor
A unicorn cake isn’t just about the looks—it should also deliver an incredible taste experience. Here are some of the best flavors that work well for a unicorn-themed cake:
Popular Unicorn Cake Flavors:
- Vanilla Cake – A timeless choice that provides a neutral base for colorful decorations. Its mild flavor pairs well with buttercream, cream cheese frosting, or fruit fillings.
- Rainbow Cake – Achieved by baking multiple colored layers, this cake surprises guests with a pop of vibrant hues when sliced.
- Funfetti Cake – A playful, kid-friendly option with rainbow sprinkles mixed into the batter for a confetti effect.
- Chocolate Cake – A rich, indulgent option that contrasts beautifully with pastel frosting. Use white chocolate buttercream for a magical twist.
- Lemon or Strawberry Cake – These fruity flavors offer a refreshing, slightly tangy taste that balances the sweetness of buttercream.
How to Add Color Layers for a Magical Effect:
To achieve a stunning rainbow or pastel ombre effect inside your cake, follow these pro tips:
✔ Use gel food coloring instead of liquid dyes. Gel-based colors provide bold, vibrant hues without thinning out the batter.
✔ Divide your batter evenly into separate bowls before adding food coloring to ensure uniform layers.
✔ Choose pastel or bright colors like pink, blue, purple, yellow, and mint green to match the unicorn theme.
✔ Pour the colored batter in layers or swirl them together to create a marbled, tie-dye, or ombre effect.
✔ For a surprise effect, bake multiple layers in different colors so each slice reveals a magical gradient.
Baking Tips for a Moist and Fluffy Cake
A unicorn cake should be as soft and moist as it is visually stunning. Here’s how to ensure your cake turns out light and fluffy every time:
Key Ingredients for Moisture and Texture:
- Use room-temperature ingredients – Eggs, butter, and milk blend more evenly when at room temperature, leading to a smoother batter.
- Incorporate buttermilk or sour cream – These ingredients add richness, moisture, and a slight tang that enhances the cake’s overall flavor.
- Opt for cake flour instead of all-purpose flour – Cake flour creates a softer, more tender crumb. If using all-purpose flour, sift it well for a lighter texture.
- Don’t overmix the batter – Overmixing develops the gluten in flour, resulting in a dense cake rather than a soft, airy one.
Baking Temperature and Time:
- Preheat your oven to 325°F–350°F – A lower temperature helps the cake bake evenly without over-browning.
- Use light-colored aluminum cake pans – Dark pans absorb more heat, which can cause the edges to overbake while the center remains undercooked.
- Check for doneness early – Insert a toothpick into the center of the cake. If it comes out clean with a few crumbs, the cake is ready.
- Avoid opening the oven door too soon – Sudden temperature changes can cause the cake to collapse in the middle.
Leveling and Prepping the Cake Layers
Once your cake layers are baked and cooled, it’s time to trim, stack, and crumb-coat them for a smooth, professional finish. Proper preparation ensures your unicorn cake looks polished and stable before adding decorations.
How to Trim and Stack Layers Evenly:
- Use a serrated knife or cake leveler – Trim the domed tops off each cake layer for a flat surface.
- Chill your cake layers before stacking – Cold cake layers are firmer and easier to work with.
- Apply a thin layer of buttercream between layers – This helps keep them in place and prevents slipping.
- Use a cake turntable – Rotating the cake while stacking ensures even placement.
Applying a Crumb Coat for a Smooth Finish:
A crumb coat is a thin layer of frosting that traps loose crumbs and creates a clean base for final decorating.
✔ Spread a thin layer of buttercream or ganache over the entire cake.
✔ Chill the cake for 15–30 minutes to let the crumb coat set.
✔ Use a bench scraper or offset spatula to smooth out the frosting before applying the final coat.
Step 2: Making and Coloring the Perfect Buttercream
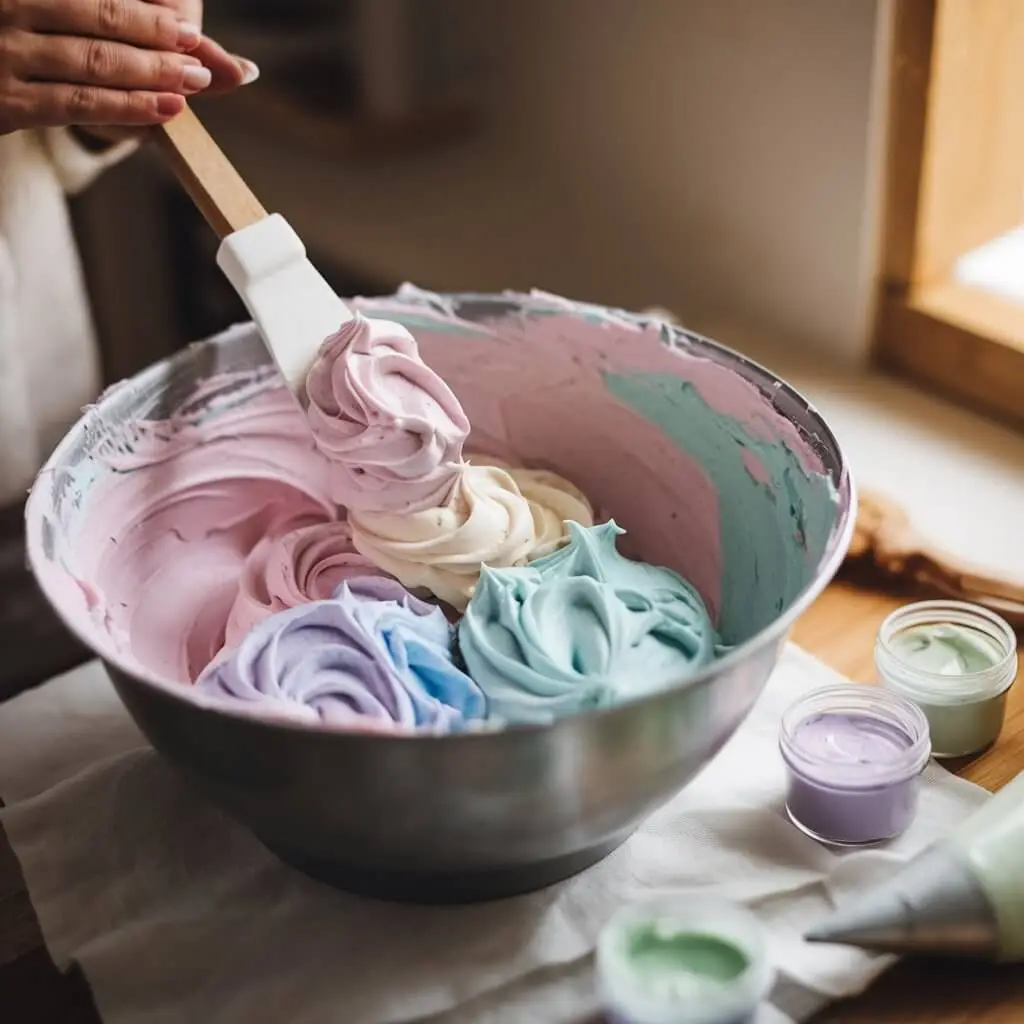
A unicorn cake is only as magical as its frosting. The right buttercream transforms a simple cake into a whimsical masterpiece, bringing vibrant pastel colors and dreamy textures to life. Whether you prefer a classic buttercream, whipped frosting, or fondant-covered design, choosing the right frosting is crucial for both aesthetics and taste. In this section, we’ll explore how to make smooth, stable frosting, achieve vivid pastel colors, and apply it like a pro.
Choosing the Best Frosting Type
There are two main choices when decorating a unicorn cake: buttercream and fondant. Each has its own benefits and challenges.
Buttercream vs. Fondant: Pros and Cons for Unicorn Cake Designs
✔ Buttercream Frosting:
- Soft, fluffy, and easy to spread.
- Allows for swirls, rosettes, and piping designs that create a textured unicorn mane.
- More beginner-friendly and forgiving when fixing mistakes.
- Can be colored and flavored easily.
- May be less smooth compared to fondant.
✔ Fondant:
- Provides a smooth, polished finish for a sleek unicorn cake design.
- Can be molded into figurines, unicorn horns, and other decorative elements.
- Holds up well in warmer temperatures without melting.
- Requires rolling and shaping skills, making it more complex for beginners.
Which One Should You Choose?
For a classic unicorn cake with rosette buttercream hair and pastel ombre effects, buttercream is the best choice. However, you can still use fondant accents for the unicorn horn, ears, and other decorative elements.
How to Make Stable Buttercream for Smooth Application
To create a perfect buttercream frosting that holds its shape and spreads evenly, follow these essential tips:
✔ Use unsalted butter at room temperature – Too cold, and it won’t mix well; too warm, and it will be runny.
✔ Sift your powdered sugar before adding it to the butter to avoid lumps.
✔ Add heavy cream or whole milk to achieve the perfect consistency. For piping, use less liquid; for smooth frosting, add slightly more.
✔ Mix on medium speed instead of high to avoid incorporating too much air, which can create bubbles.
✔ Chill your buttercream for 10–15 minutes before applying it to maintain stability, especially in warm climates.
Creating Vibrant Pastel Colors
A unicorn cake isn’t complete without its signature pastel hues, whether you’re going for a gradient ombre effect or a multicolored buttercream swirl. Getting bright, non-fading colors is essential for an eye-catching design.
The Best Gel Food Coloring Brands for Bold, Non-Fading Colors
Unlike liquid food coloring, gel-based food colors provide rich pigmentation without altering the consistency of your buttercream. Here are some of the best brands to use:
✔ AmeriColor – Provides bright, even coloring with just a small amount.
✔ Wilton Gel Colors – Easy to find and blend for pastel and ombre effects.
✔ Chefmaster – Highly concentrated and perfect for achieving vibrant, non-fading tones.
✔ Sugarflair – A favorite among professional bakers for deep, intense colors.
How to Achieve a Perfect Ombre or Rainbow Effect
✔ For an ombre cake:
- Divide buttercream into 3–5 shades of the same color.
- Start with the darkest shade at the bottom of the cake and gradually blend into lighter shades towards the top.
- Use a bench scraper to smooth the transitions between colors.
✔ For a rainbow effect:
- Color separate batches of buttercream in pink, purple, blue, yellow, and mint green.
- Pipe small sections in each color around the cake, then blend using a spatula or scraper.
- Swirl colors together slightly for a magical tie-dye effect.
✔ For unicorn mane swirls:
- Fill a piping bag with two or more colors of buttercream (side by side).
- Use a large star tip to create multi-colored swirls and rosettes.
Frosting Application Tips
The way you apply buttercream makes a huge difference in the final look of your unicorn cake. From achieving a smooth finish to piping beautiful textures, these techniques will elevate your decorating skills.
Using a Turntable for a Flawless Buttercream Finish
A cake turntable is an essential tool for even frosting application. Here’s how to use it effectively:
✔ Place your cake on a sturdy cake board before setting it on the turntable.
✔ Apply a crumb coat first, then refrigerate the cake for 15–30 minutes.
✔ Use an offset spatula to spread the final layer of buttercream smoothly.
✔ Hold a bench scraper against the side while turning the cake to even out the buttercream.
How to Pipe Textures Like Ruffles, Rosettes, and Swirls for a Whimsical Look
Unicorn cakes are known for their dreamy swirls, piped rosettes, and textured details that resemble a flowing mane. Here’s how to achieve them:
✔ Rosettes & Swirls: Use a large star tip (Wilton 1M or 2D) to pipe soft, cloud-like rosettes.
✔ Ruffles: Hold a petal tip (Wilton 104) at an angle and pipe in a back-and-forth motion.
✔ Shell Borders: Use a round tip (Wilton 12) for delicate pearl-like shell accents.
✔ Multi-Colored Swirls: Fill a piping bag with two or three colors side by side to create a beautiful gradient effect in every swirl.
With a vibrant, stable buttercream base, your unicorn cake is well on its way to looking truly magical. Now that you’ve mastered coloring and frosting techniques, it’s time to move on to the most exciting part—decorating your unicorn cake with fondant details, edible pearls, and the signature golden horn!
Step 3: Decorating with Fondant and Edible Accents
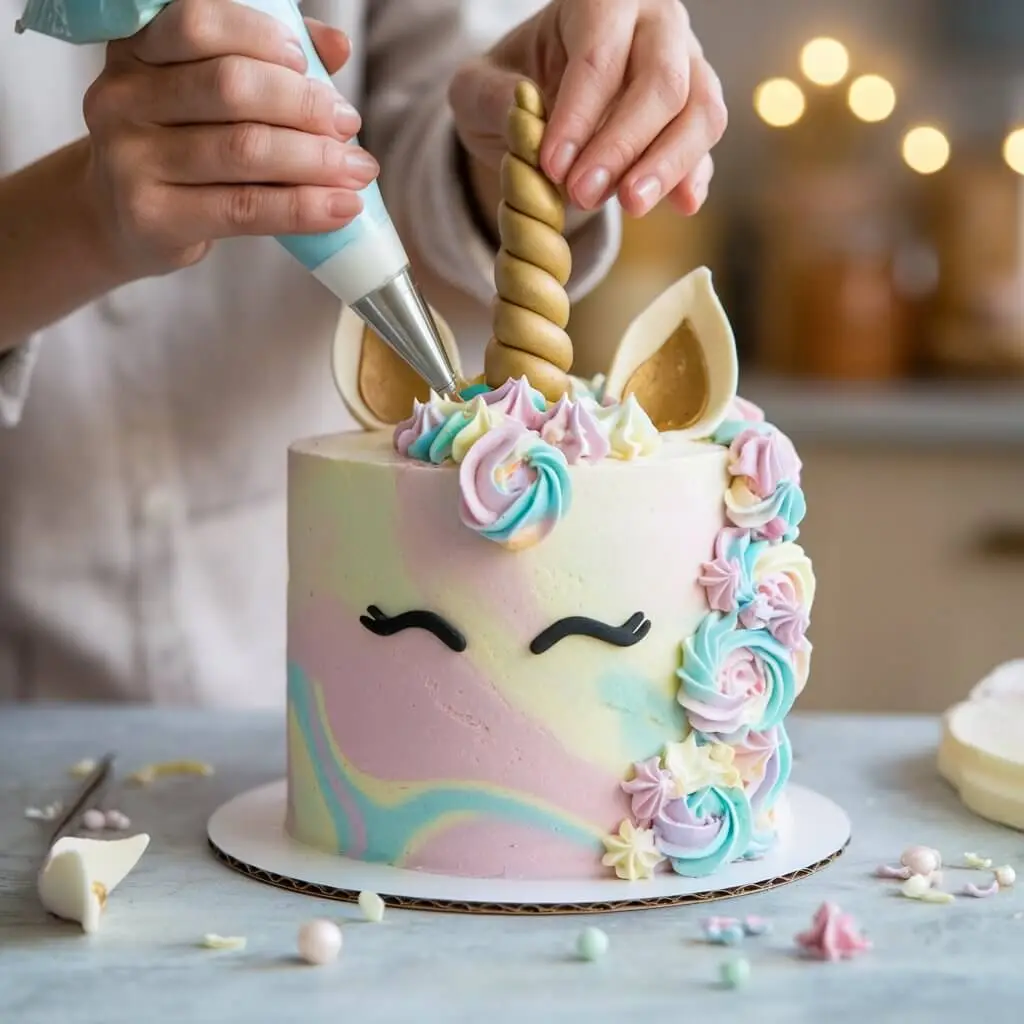
Now that your unicorn cake is perfectly baked and covered in vibrant buttercream, it’s time to bring it to life with stunning decorations! This step is where the magic happens, as you’ll craft the iconic unicorn horn, ears, and expressive eyes, along with a whimsical buttercream mane filled with rosettes, swirls, and pastel shades.
Whether you’re using fondant, edible pearls, or piped buttercream, these decoration techniques will transform your cake into a show-stopping masterpiece. Let’s break it down step by step.
Shaping and Placing the Unicorn Horn and Ears
The unicorn horn is the centerpiece of the cake, symbolizing its mythical and magical essence. It needs to be tall, stable, and golden to create the signature unicorn look.
How to Make a Fondant or Chocolate Unicorn Horn
- Using Fondant:
✔ Roll a thick piece of white or yellow fondant into a long rope.
✔ Twist the rope into a spiral shape and taper one end to a point.
✔ Insert a wooden skewer or toothpick through the center for stability.
✔ Let it dry for 4–6 hours before painting it with edible gold dust or luster dust mixed with clear alcohol (like vodka) for a shiny finish. - Using Modeling Chocolate:
✔ Follow the same steps as fondant, but chill the chocolate horn before handling to prevent softening.
✔ Chocolate holds shape better and creates a smoother finish when painted with edible gold.
Positioning the Unicorn Horn
- Place the horn in the center of the cake using the skewer for support.
- If needed, add a small amount of melted white chocolate to secure it in place.
Creating the Signature Unicorn Eyes
The unicorn’s eyes give it personality and charm. You can make them using black fondant, edible markers, or piped buttercream.
Best Methods for Making Unicorn Eyes:
- Fondant Eyes:
✔ Roll out black fondant and cut two curved shapes using a small knife or template.
✔ Use white fondant dots to create a sparkle effect in the eyes.
✔ Carefully place the eyes on the front of the cake using edible glue or a tiny bit of water. - Edible Marker Eyes:
✔ Use a fine-tip edible black marker to draw long, curved eyelashes directly onto the buttercream.
✔ Add extra lashes for a more dramatic effect. - Piped Buttercream Eyes:
✔ Use a small round piping tip (#2 or #3) to pipe the outline of the eyes with black buttercream.
✔ Gently drag a toothpick through the piping to create delicate lashes.
Adding Decorative Elements for Extra Magic
The finishing touches make all the difference in achieving a picture-perfect unicorn cake. Buttercream rosettes, edible glitter, and pastel accents enhance the cake’s whimsical aesthetic.
How to Make a Buttercream Mane with Colorful Rosettes
- Prepare pastel buttercream colors in piping bags fitted with star tips (Wilton 1M or 2D).
- Pipe rosettes, swirls, and small dollops in different colors to create a flowing mane effect.
- Start piping from the top of the unicorn’s head and cascade down one side for an elegant look.
- Use different piping tips to add variety in texture, such as ruffles, stars, and teardrop shapes.
Enhancing the Cake with Edible Accents
- Sprinkle edible glitter or luster dust over the buttercream mane for a magical shimmer.
- Add gold or silver edible pearls to resemble tiny stars.
- Use tiny fondant flowers or pastel sprinkles to create a dreamy, fairy-tale-like effect.
- If desired, attach small sugar butterflies or stars to the sides of the cake for extra flair.
Securing Decorations for a Long-Lasting Design
Once your unicorn cake is decorated, it’s important to ensure that the elements stay secure and intact.
✔ Chill the cake for 15–30 minutes after decorating to help the buttercream set.
✔ If transporting, use a cake box with support dowels to prevent movement.
✔ Keep the cake in a cool, dry place to prevent fondant decorations from softening.
With the horn, ears, eyes, and buttercream mane in place, your unicorn cake is now a dazzling centerpiece ready to impress! Next, we’ll focus on stacking and assembling the cake for the perfect finish, ensuring all elements are balanced, stable, and beautifully presented.
Step 4: Assembling and Perfecting the Unicorn Cake Look
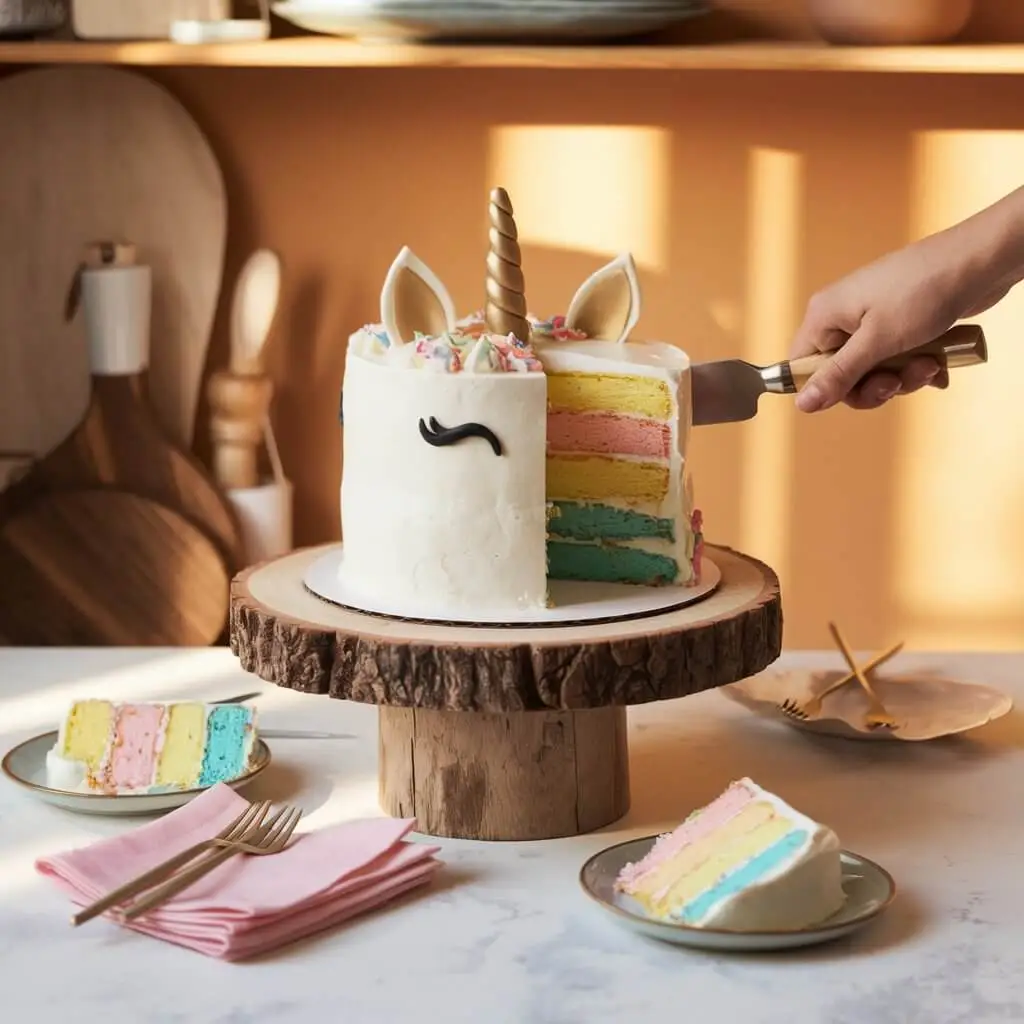
Now that all the decorative elements—buttercream mane, fondant horn, unicorn ears, and eyes—are ready, it’s time to bring everything together. Assembling the unicorn cake correctly ensures stability, balance, and a flawless final look. This step involves stacking layers properly, achieving a professional buttercream finish, and avoiding common mistakes that could ruin your masterpiece.
Follow these expert tips to secure your unicorn cake structure, smooth out the buttercream, and add the finishing details for a picture-perfect presentation.
Stacking and Final Touches
Proper assembly is crucial for a unicorn cake, especially if it consists of multiple layers. The goal is to create a stable structure that supports the decorations while maintaining a polished appearance.
How to Stack a Multi-Layer Unicorn Cake Correctly
- Trim each cake layer evenly using a serrated knife or cake leveler to remove domed tops.
- Place a thin layer of buttercream between each cake layer to hold them together.
- Use a cake turntable while stacking to ensure alignment and easy maneuvering.
- Insert support dowels (if using a tall cake) to prevent layers from shifting or collapsing.
✔ Pro Tip: Before adding decorations, chill the stacked cake for at least 30 minutes to firm up the buttercream and improve stability.
Creating a Professional Finish
To achieve a bakery-quality unicorn cake, the buttercream should be smooth and seamless, with well-defined decorations.
How to Smooth Buttercream Like a Pro
- Use an offset spatula to spread an even coat of buttercream over the stacked cake.
- Hold a bench scraper against the sides while slowly rotating the cake on the turntable.
- Dip the scraper in warm water, wipe off excess, and use it to smooth the final layer.
- If using fondant, apply a thin layer of buttercream underneath to help it adhere.
✔ Pro Tip: If air bubbles appear in the buttercream, use a small needle or toothpick to pop them, then smooth with the spatula.
Adding a Magical Touch with Edible Accents
Now that your unicorn cake is assembled and covered in a smooth buttercream finish, it’s time to add those last decorative touches that make it truly magical.
Ideas for Enhancing the Cake’s Final Look
- Gold shimmer or luster dust – Lightly brush edible gold dust onto the unicorn horn and ears for an elegant touch.
- Pastel buttercream details – Use a piping bag with a round or petal tip to add additional swirls, ruffles, or pearls along the cake base.
- Edible glitter or pearl sprinkles – Lightly dust the buttercream mane for extra sparkle.
- Small fondant flowers, stars, or butterflies – Place these around the base or sides of the cake for a dreamy fairy-tale effect.
✔ Pro Tip: Keep decorations lightweight and evenly distributed to maintain balance and prevent them from sinking into the frosting.
Common Mistakes to Avoid
Even experienced bakers encounter challenges when decorating a unicorn cake. Here are some common mistakes and how to fix them:
❌ Fondant decorations won’t stay in place
✔ Use edible glue, melted white chocolate, or piping gel to attach fondant pieces securely.
❌ Buttercream colors start to blend together
✔ Chill the cake between steps to set each color layer before adding the next.
❌ The unicorn horn tilts or falls over
✔ Insert a wooden skewer inside the fondant horn and push it deep into the cake for stability.
❌ Buttercream looks rough or uneven
✔ Let the final coat chill for 10 minutes, then use a warm bench scraper to smooth out imperfections.
By following these assembly, smoothing, and decorating techniques, your unicorn cake will look as flawless as it tastes! With all the elements in place, it’s time for the final step—storing and serving your magical unicorn cake for the perfect party presentation.
Step 5: Storing and Serving the Unicorn Cake
Your unicorn cake is now complete—decorated with a beautiful buttercream mane, golden fondant horn, delicate eyes, and whimsical pastel swirls. However, proper storage and serving techniques are essential to maintain the cake’s freshness, stability, and stunning appearance until it’s time to cut and enjoy.
This step covers how to store the cake properly, the best ways to cut and serve it without ruining the design, and creative variations to make your unicorn cake even more magical.
How to Store Your Cake for Freshness
To keep the cake looking and tasting perfect, you need to store it correctly based on how soon it will be served.
Short-Term Storage (Serving the Same Day)
✔ Keep the cake at room temperature in a cool, dry place if serving within 6–8 hours.
✔ Place it in a cake box or loosely covered with plastic wrap to prevent dust or drying out.
✔ Avoid direct sunlight or humid areas to prevent buttercream melting.
Overnight Storage (Serving the Next Day)
✔ Place the cake in a cake box or airtight container and store it in the refrigerator.
✔ Before serving, let the cake sit at room temperature for 30–60 minutes to allow the buttercream to soften.
✔ If the cake has fondant decorations, keep it in a dry area as humidity can make fondant sticky.
Freezing the Cake for Later Use
✔ If storing for longer than a few days, freeze the fully decorated cake.
✔ Place the cake in the freezer uncovered for 1–2 hours to set the decorations.
✔ Once firm, wrap the cake tightly in plastic wrap and aluminum foil to prevent freezer burn.
✔ When ready to serve, thaw the cake in the refrigerator overnight and bring it to room temperature before slicing.
Serving Tips for the Best Presentation
A unicorn cake is a centerpiece at any celebration, so cutting and serving it the right way ensures perfect slices while keeping the design intact.
How to Cut a Unicorn Cake Without Ruining the Design
- Use a warm knife – Run the blade under hot water, then wipe dry before cutting for smooth, clean slices.
- Cut from the back or side first – Preserve the decorated front as long as possible for photos.
- For tall cakes, use the layer-by-layer method – Slice through one layer at a time instead of cutting all the way down.
- For buttercream-heavy cakes, wipe the knife between cuts to keep slices neat.
✔ Pro Tip: Serve each slice with a small piece of extra buttercream or fondant accents to ensure guests get a taste of every decorative element!
Fun Variations to Try
Want to get even more creative with your unicorn cake? Try these fun variations for a unique twist on the classic design:
Mini Unicorn Cakes
- Bake individual cake layers and assemble miniature versions for each guest.
- Use cupcake-sized cake rounds to create personalized unicorn cakes.
- Great for kids’ parties or dessert table displays.
Unicorn Cupcakes
- Instead of a full cake, bake unicorn-themed cupcakes with swirled pastel buttercream and tiny fondant horns.
- Perfect for easier serving at large events.
Unicorn Drip Cake
- Add a white chocolate ganache drip in pastel colors for a dripping rainbow effect.
- Drizzle over the edges of the cake before adding the buttercream mane.
A perfect unicorn cake isn’t just about baking and decorating—it’s also about ensuring freshness, presentation, and easy serving. With these storage and cutting techniques, your cake will remain magical and delicious from the moment it’s made until the last bite is enjoyed.
Now that you’ve mastered the art of making a unicorn cake, it’s time to show off your creation! Share your unicorn cake photos and baking experiences in the comments below, and let us know if you tried any of the fun variations. Happy baking!
Final Thoughts on Creating the Perfect Unicorn Cake
Bringing a unicorn cake to life is a magical experience, combining creativity, baking skills, and artistic decorating techniques. Whether you’re making it for a birthday, a special celebration, or just for fun, every step contributes to the final show-stopping design. From baking the perfect cake base to creating dreamy pastel buttercream swirls and adding golden fondant accents, this guide has walked you through every detail needed to achieve a bakery-quality unicorn cake at home.
But before you put away your piping bags and sprinkle dust, let’s go over some final key takeaways, expert tips, and ways you can customize your unicorn cake even further!
Key Takeaways for a Flawless Unicorn Cake
To ensure your cake turns out moist, colorful, and perfectly decorated, keep these important points in mind:
✔ Choose a sturdy yet fluffy cake base – Vanilla, funfetti, or rainbow cakes work best for layering and decoration.
✔ Use gel food coloring – It provides bold, vibrant colors without altering the cake or buttercream consistency.
✔ Chill the cake between decorating steps – This prevents smudging and helps buttercream set properly.
✔ Secure the unicorn horn and ears well – Use toothpicks, dowels, or edible glue to keep fondant decorations in place.
✔ Store the cake correctly – Keep it covered at room temperature for same-day serving or refrigerate for freshness.
Following these best practices will help ensure a smooth decorating process and a visually stunning unicorn cake every time!
Troubleshooting Common Unicorn Cake Challenges
Even experienced bakers encounter hiccups when making decorative cakes. Here’s how to fix some of the most common unicorn cake issues:
❌ Buttercream won’t smooth out properly
✔ Chill the cake for 10–15 minutes, then use a bench scraper dipped in warm water to smooth out imperfections.
❌ Fondant decorations are drooping
✔ Allow fondant pieces to dry for a few hours before placing them on the cake to maintain their shape.
❌ Colors are mixing and creating muddy shades
✔ Pipe each color separately and avoid excessive blending when creating a rainbow or ombre effect.
❌ Unicorn horn is falling over
✔ Insert a wooden skewer inside the horn and push it deep into the cake for added stability.
Baking and decorating are learning experiences, and every mistake is an opportunity to improve your skills. Keep practicing, and soon you’ll be crafting unicorn cakes like a professional!
Creative Ways to Customize Your Unicorn Cake
Want to make your unicorn cake even more unique? Here are some fun variations and add-ons to try:
1. Themed Unicorn Cakes
- Galaxy Unicorn Cake – Use deep blues, purples, and silver accents for a space-inspired design.
- Floral Unicorn Cake – Add hand-piped buttercream flowers for a delicate, nature-inspired look.
- Halloween Unicorn Cake – Swap pastels for black, orange, and purple frosting to create a spooky unicorn cake.
2. Different Cake Shapes and Sizes
- Try a two-tier unicorn cake for an extra special occasion.
- Make mini unicorn cakes using small round layers or mousse cakes.
- Create a unicorn sheet cake for a quicker, easy-to-serve version.
3. Alternative Ingredients for Dietary Needs
- Use gluten-free cake flour for a gluten-free unicorn cake.
- Replace butter with vegan margarine and coconut milk for a dairy-free version.
- Swap sugar with honey or maple syrup for a naturally sweetened unicorn cake.
Share Your Magical Unicorn Cake Creations!
Now that you’ve mastered the art of unicorn cake baking and decorating, it’s time to showcase your masterpiece! Whether you went with a classic pastel unicorn, a rainbow swirl effect, or a customized themed version, we’d love to see your results.
✔ Post your unicorn cake photos and tag us on social media!
✔ Share your experience in the comments – What was your favorite part of the decorating process?
✔ Ask any baking questions – Need troubleshooting help? We’re here to assist!
Baking is all about creativity, fun, and making delicious memories. So don’t be afraid to experiment with colors, textures, and designs—every unicorn cake is unique, just like the baker behind it.
Happy baking, and may your kitchen be filled with sparkles, sprinkles, and unicorn magic!
To discover more about my cooking journey and get to know me better, head over to my About Me page for all the details!

